Running your first automation
Now that you have installed the LIFE Automation Panel on your LIFE System computer, it's time to run your first automated protocol.
In this tutorial, you will learn how to:
Execute an automation
Stop the current automation
Schedule an automation
Modify existing schedules
Before you start
Make sure that:
the LIFE Automation Panel is fully installed on your LIFE System computer and ready for use.
you have checked all important prerequisites before starting your first automation.
Choosing a client
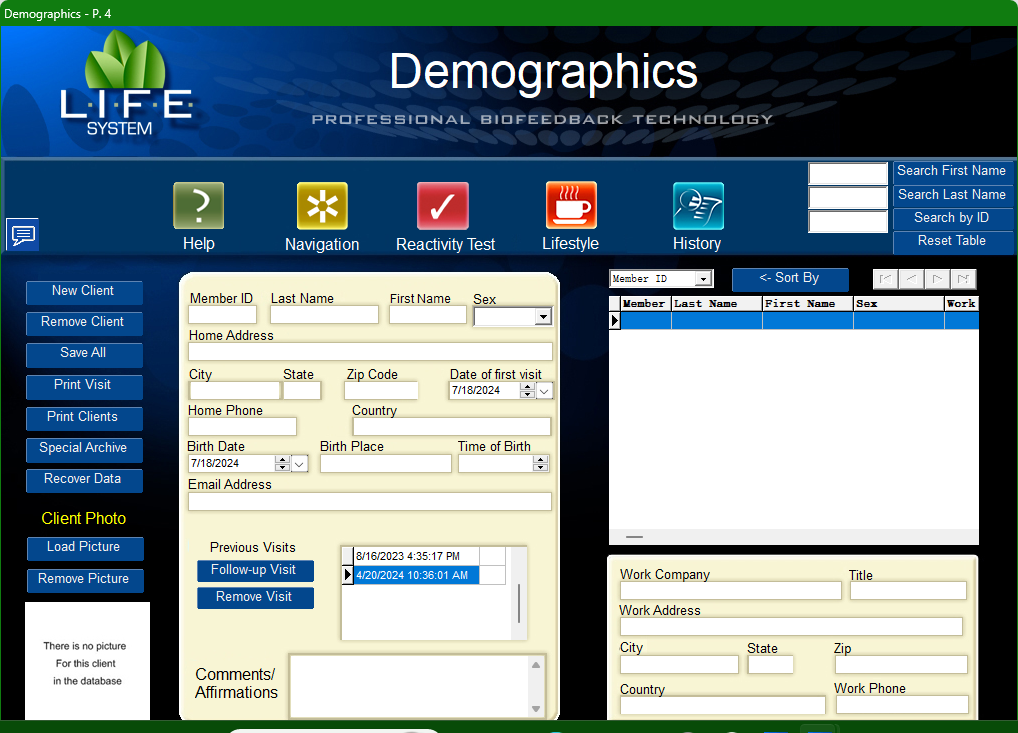
Before you can run or schedule an automation, you must have a client ready for your session. The LIFE Automation Panel uses a Client ID number that can be found in the LIFE System's Demographics panel.
Finding a client's ID
Log in to the LIFE System software.
From the Navigation panel, click Demographics.
You may locate your client by first or last name. Their ID number will appear in the table on the right side of the screen under Member. If you click on the client's name to select it, the ID number will also appear in the Member ID field on the left side of the screen.

How to run an automation
The LIFE Automation Panel contains 22 Protocols that can be executed on any of your clients in the LIFE System.
Execute instantly
Select a protocol in the Protocols box on the left side of the screen. The name of the protocol will appear in a text box at the bottom right of the screen.
In the ID box on the bottom right, enter the ID number of your client.
Click Run to instantly execute the protocol. Ignore the Date/Time field.
At any time while LIFE Automation Panel is running, you can force the current protocol to stop.
Stopping the current automation
Press F8 on your keyboard, OR click the STOP (F8) button on the Sidebar on the right of the screen.
The automation sequence will instantly be stopped and cannot be resumed. You must manually exit the LIFE System before starting another automation.
Protocols can also be scheduled to be executed unattended at a later date and time.
Scheduling an automation
Select a protocol in the Protocols box on the left side of the screen. The name of the protocol will appear in a text box at the bottom right of the screen
In the ID box on the bottom right, enter the ID number of your client.
Click on the date and use number/arrow keys to set the date. You can also click the Calendar icon to select a day on the calendar.
Click on the time and use number/arrow keys to set the time. To select AM/PM, press A or P on your keyboard, or use the arrow keys.
Click Schedule to submit the automation to the schedule. A dialog box will appear to display the scheduled task information and the task will appear in the scheduled list on the right side of the Automation interface.
Sometimes, you may incorrectly schedule an automation (for example, schedule a session for the wrong time or would like to remove the schedule). You can delete existing scheduled and reschedule them.
Modifying existing schedules
Locate the list of tasks on the right side of the Automation interface. Click on the task you would like to delete.
Click Delete in the bottom right corner. A dialog box will appear confirming that the item has been deleted.
You may now reschedule the protocol as intended.